If I have an embroidery patch or crest, how can I apply it to a cap or other garments without sewing it?
Add Your Heading Text Here
Attaching an embroidery patch or crest to a cap or garment without sewing is a common desire, and there are several effective methods you can use. The best choice depends on the type of patch and garment, as well as how permanent you want the attachment to be.
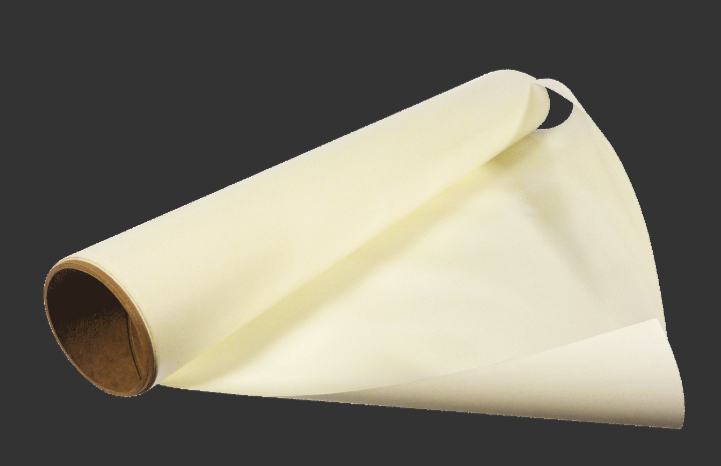
Buy thermal adhesive by the yard here:
Thermal Adhesive Film for Crest
Here are the most common no-sew methods:
Iron-On Patches (Heat-Activated Adhesive)
This is the most popular and straightforward no-sew method. Many patches come with a heat-activated adhesive backing.
How it works: The back of the patch has a layer of glue that melts when heated and bonds to the fabric.
Best for: Cotton, denim, and other heat-safe fabrics. It’s a quick and relatively permanent solution.
Tools needed: An iron or heat press, and a pressing cloth (parchment paper or a thin cotton cloth).
Instructions:
Preheat your iron to the appropriate setting for your fabric (usually a high cotton setting with no steam).
Place the garment on a flat, heat-resistant surface (like an ironing board).
Position the patch where you want it.
Cover the patch with a pressing cloth to protect both the patch and the fabric.
Press down firmly with the iron for 20-30 seconds, applying even pressure. For a cap, a heat press or hair straightener can be useful for the curved surface.
Allow the garment and patch to cool completely before checking the bond.
Note: For thicker fabrics like hoodies or jackets, you may need to apply heat to the back of the garment as well to ensure the adhesive fully melts.
#embroiderythermaladhesive #embroideryglue #patchglueadhesive #crestapplication #thermaladhesive