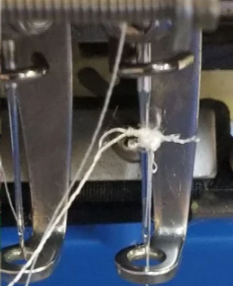
What can I do if the thread keeps fraying?
Thread fraying on a commercial embroidery machine is a common and frustrating problem that can lead to frequent thread breaks and lost production time. It’s often caused by excessive friction or damage to the thread path. Here’s a comprehensive guide to troubleshooting and fixing the issue, categorized from most common causes to less frequent ones.
1. Check the Needle
The needle is one of the most common culprits for thread fraying.
Replace it. Needles have a lifespan of about 8 hours of running time. A damaged or dull needle, even if the damage isn’t visible to the naked eye, can cause the thread to fray.
Check the type and size. Make sure you’re using the correct needle type and size for your thread and fabric. A needle that is too small for the thread will create too much friction and stress.
Check the insertion. Ensure the needle is inserted correctly, pushed all the way up, and that the eye is facing forward (or slightly to the right, depending on your machine’s specifications).
2. Inspect the Thread Path for Burrs or Nicks
A rough spot anywhere along the thread’s journey can abrade and fray it.
Thread Guides and Tension Discs: Carefully run your fingers along the entire thread path, from the cone to the needle. Check the thread guides, take-up levers, and tension discs for any nicks, scratches, or burrs.
Needle Plate and Presser Foot: Inspect the hole in the needle plate and the presser foot for any damage. A burr here can be caused by a broken needle hitting the plate.
Rotary Hook: The rotary hook can also develop burrs, which can cause thread fraying and other issues like bird nesting and skipped stitches.
If you find a rough spot, you can sometimes carefully smooth it with a very fine abrasive cloth, but it’s often best to consult your machine’s manual or a technician.
3. Adjust Thread Tension
Incorrect thread tension is a major cause of thread problems, including fraying.
Top Tension: If the top tension is too tight, it will put excessive strain on the thread, causing it to fray and break. Try loosening the tension on the top thread.
Bobbin Tension: While less common for fraying, an improperly tensioned bobbin can create an imbalance that puts more stress on the top thread. Ensure your bobbin is wound correctly and that the bobbin case is free of lint.
4. Evaluate Your Thread and its Storage
The thread itself can be the source of the problem.
Quality: Low-quality thread may have inconsistencies or weak fibers that make it prone to fraying. Use high-quality polyester or rayon embroidery thread. Polyester is often recommended for its high tensile strength and fray resistance, especially on high-speed machines.
Age and Storage: Old, improperly stored thread can become brittle and break down. Store your thread in a cool, dry place away from direct sunlight.
Unwinding: Ensure the thread is unwinding smoothly from the cone or spool without catching or snagging.
5. Check Machine Maintenance and Settings
Sometimes the issue is related to the overall condition of the machine.
Clean and Lubricate: A build-up of lint, dust, and debris in the thread path, tension discs, and bobbin area can cause problems. Keep your machine clean and follow the manufacturer’s lubrication schedule.
Machine Speed: If the machine is running too fast for the thread or design, it can create excessive heat and friction, leading to fraying. Try slowing down the machine speed.
Digitizing: A poorly digitized design with overly dense areas or too many stitches in one spot can put unnecessary stress on the thread.
If you’ve tried all of these troubleshooting steps and the problem persists, it may be a sign of a more complex mechanical issue, such as a timing problem or worn-out parts. In that case, it’s best to contact a professional embroidery machine technician.
#embroiderypolyesterthread #embroiderytroubleshooting #prewoundbobbins #superbthread #threadfraying
